kintsugi workshop
Yesterday I was lucky enough to get a spot in a 2-hour kintsugi workshop run by railway street studios in collaboration with an astute assembly as part of auckland’s art week.
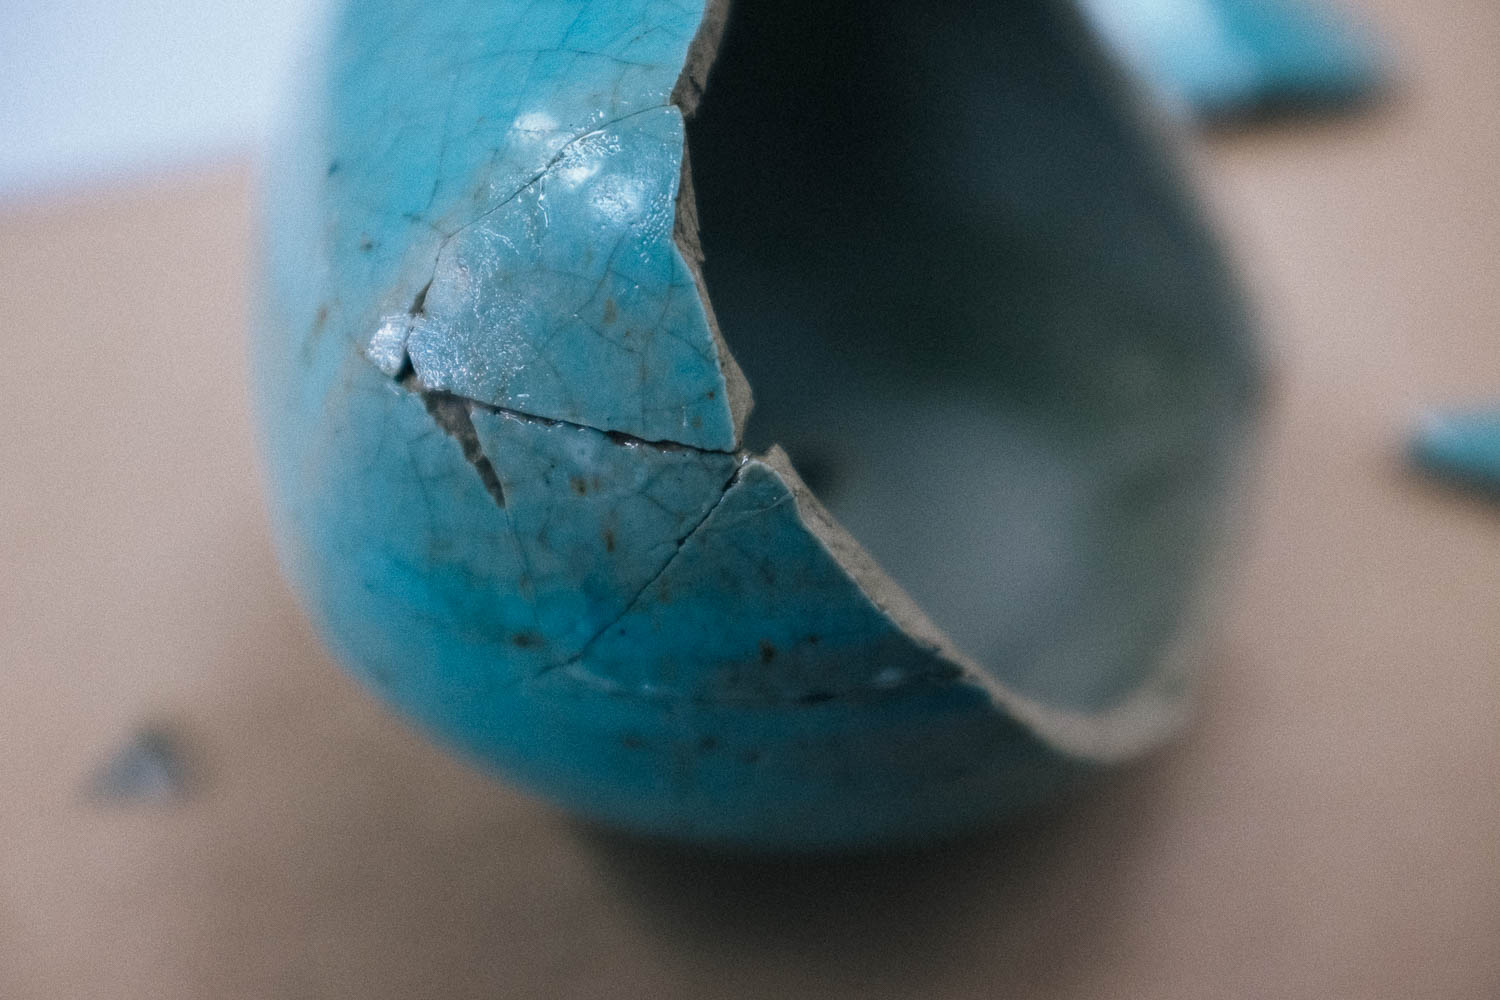
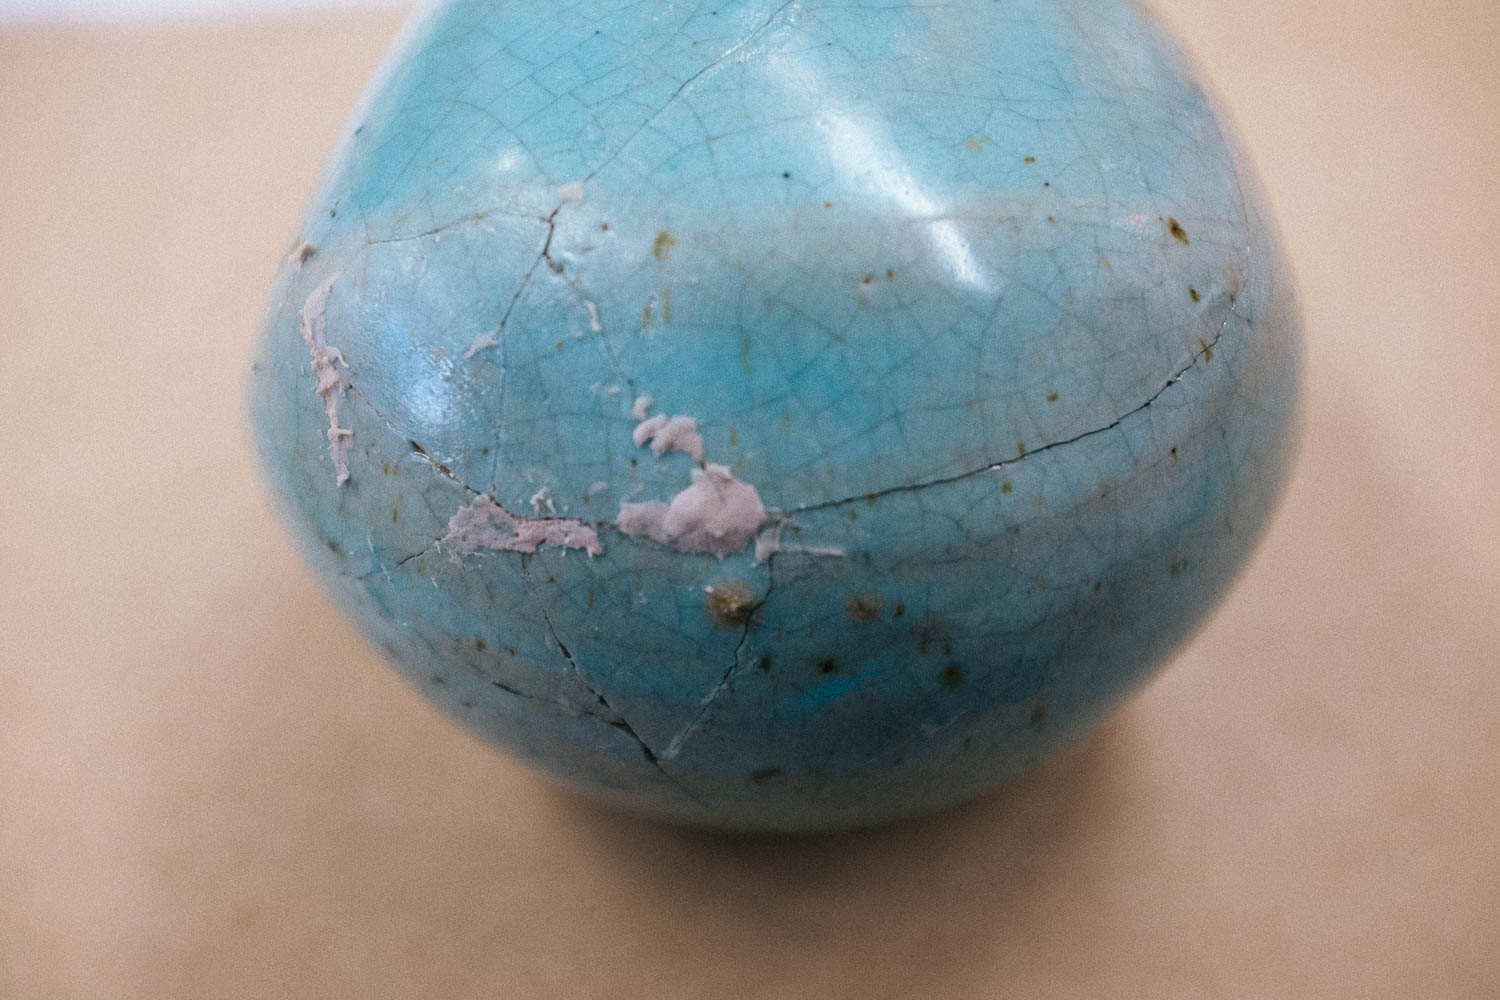
we were asked to bring along a broken piece of pottery that we wanted to repair and i had just the thing – one of lotte glob’s floating stones, bought on our travels in the highlands of scotland a few years ago, accidentally broken by a curious toddler visiting our home. it’s been sitting outside for months, waiting for me to decide what to do with it. it’s so pretty, and i love the story behind the floating stones so much, i didn’t have the heart to throw it out. yesterday i spent a fair amount of time congratulating my past self for hanging on to it… it was the perfect candidate for repair.
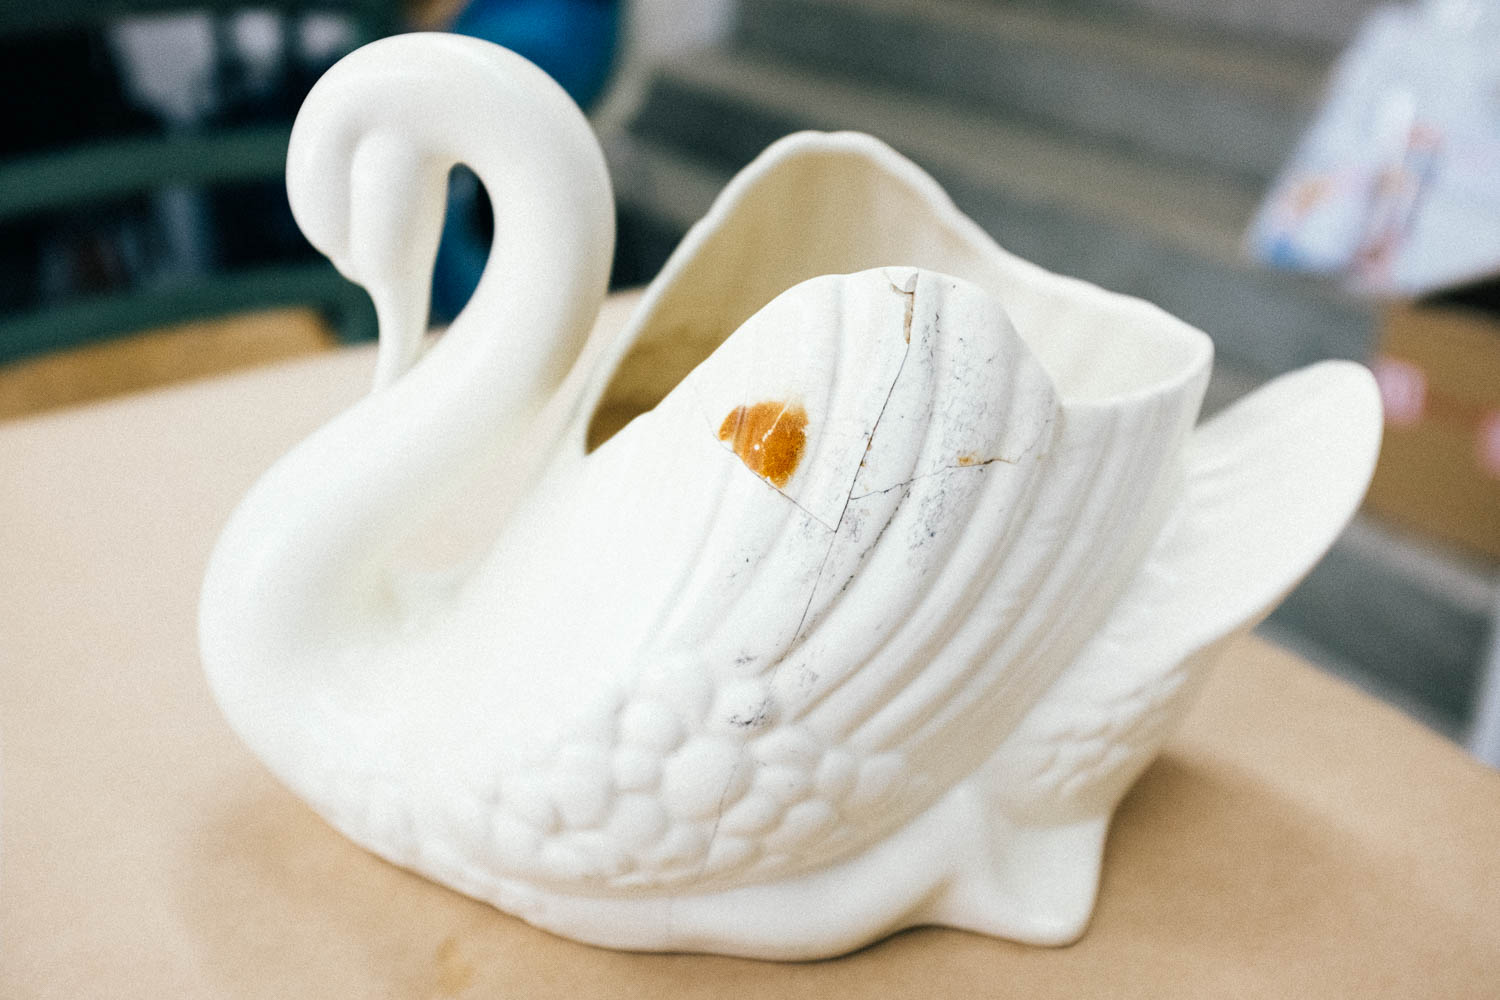
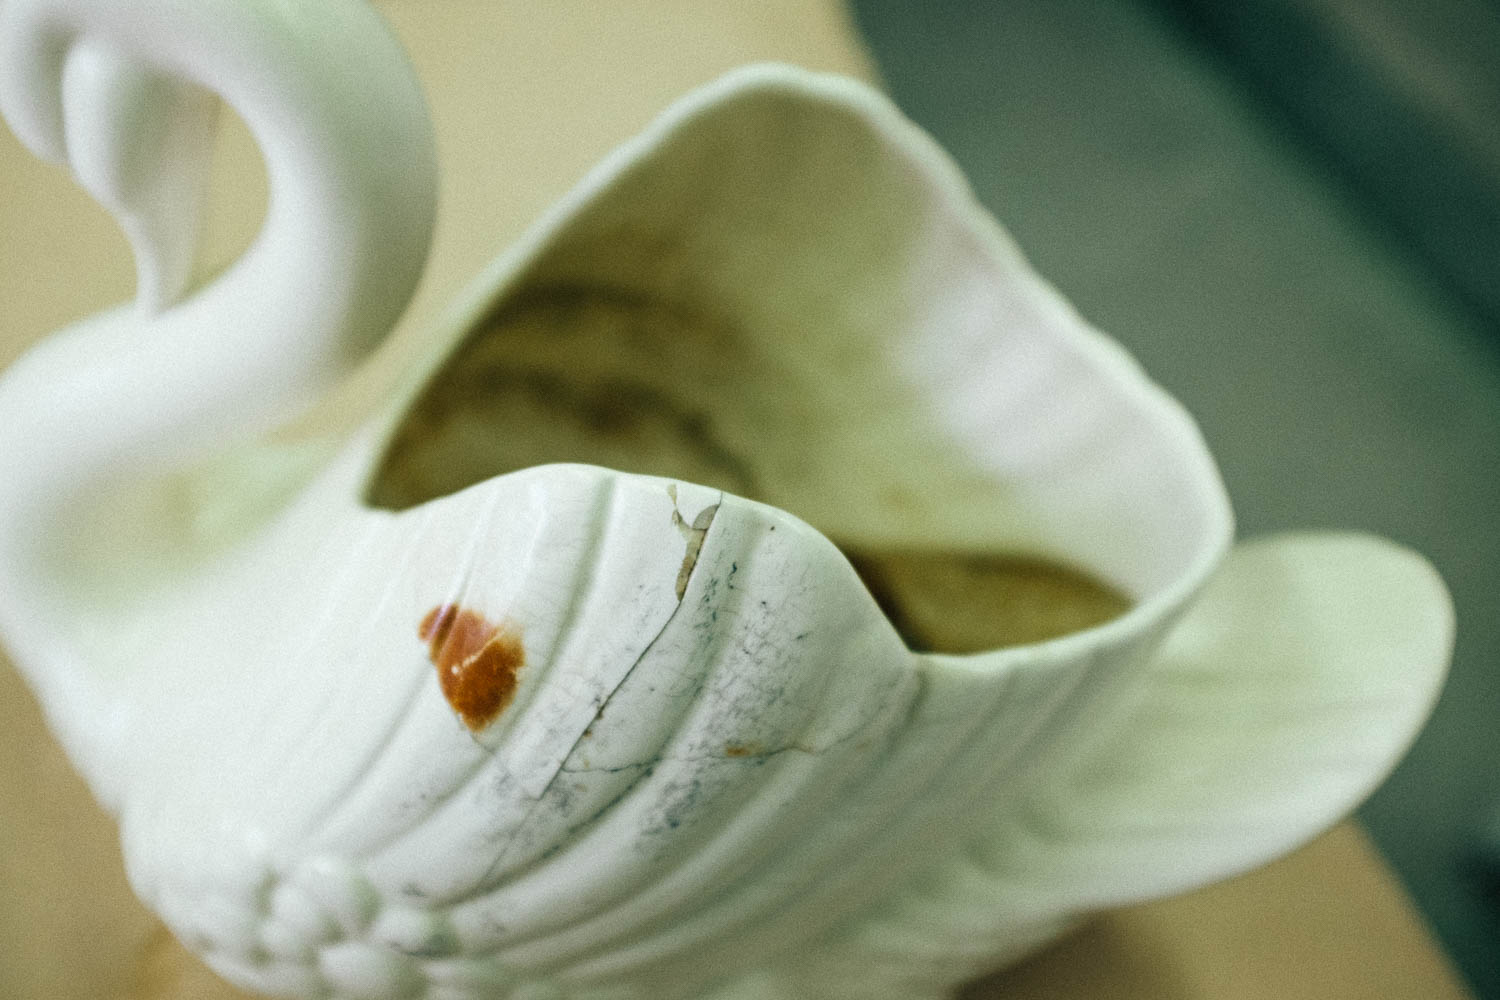
i also have a crown lynn swan that my mother gave me. i have no idea how long she’s had it, but it’s been around since my earliest memories and probably long before that. it’s always had some kind of pot plant in it, but was broken many years ago somehow. i’d mended it, but it still looked pretty shabby, with a brown stain i couldn’t get off and a nasty looking scar down one side. more like an ugly duckling than a graceful swan and not the kind of retirement i wanted for such a grand and elegant piece of new zealand’s ceramic history. it seemed only right to honour it with some kintsugi love.
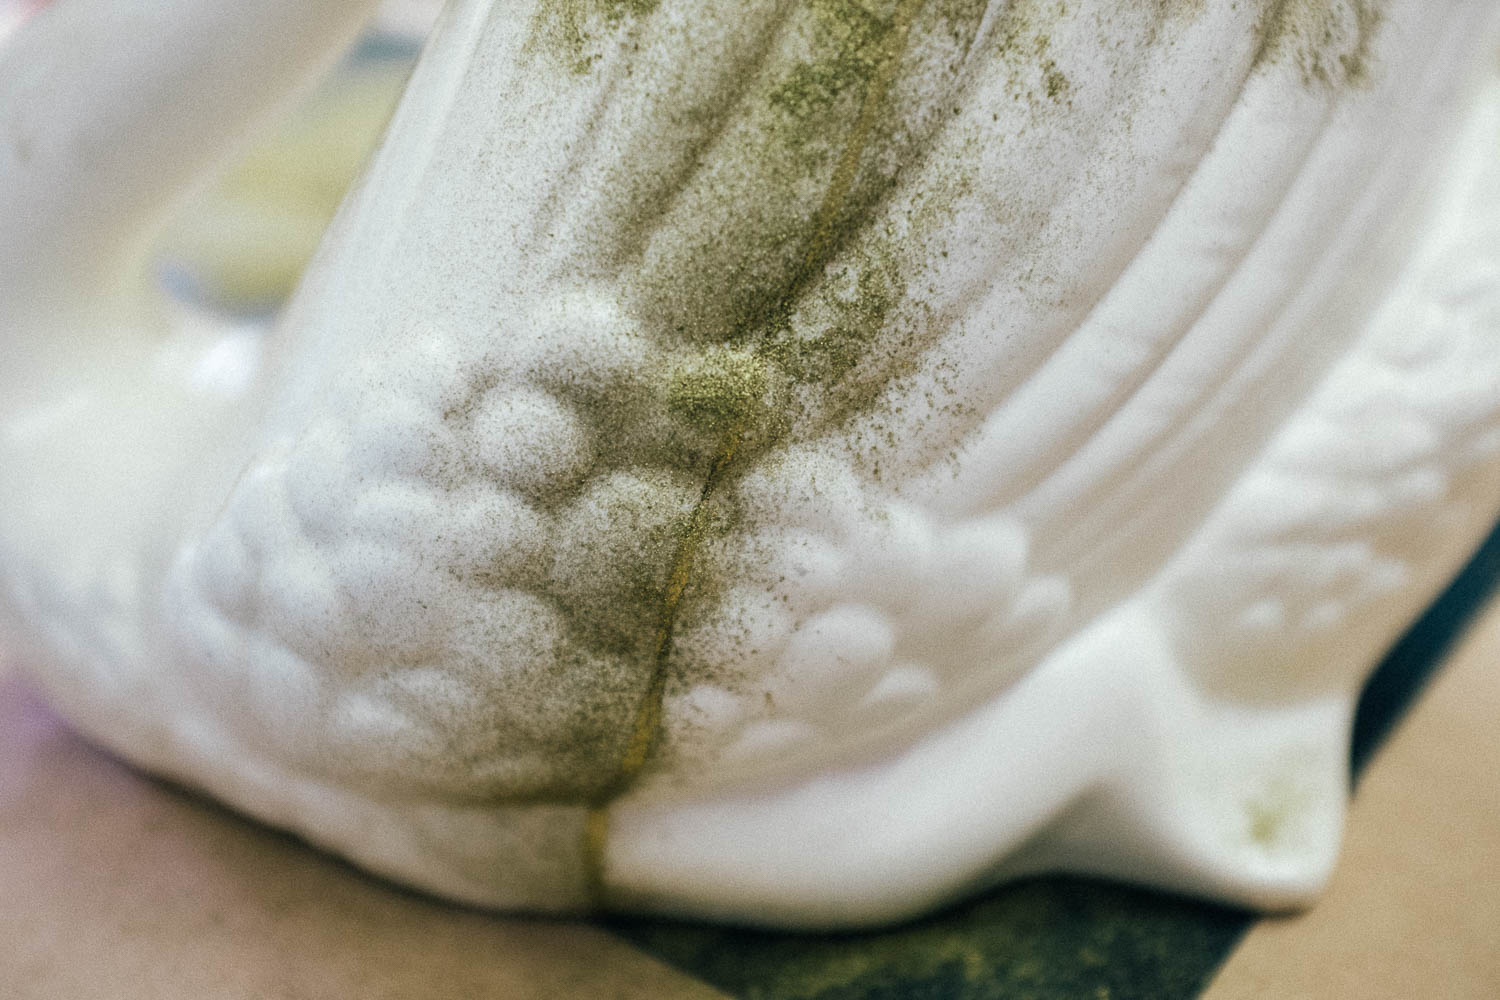
kintsugi translates from the japanese as golden joinery and is the art of repairing broken pottery with lacquer dusted or mixed with powdered gold, silver, or platinum. i love the philosophy behind it, viewing breakage and repair as part of the history of an object, rather than something to disguise. given that gold, silver and platinum are pricey, we used brass in the workshop. still, i think the results will be fabulous.
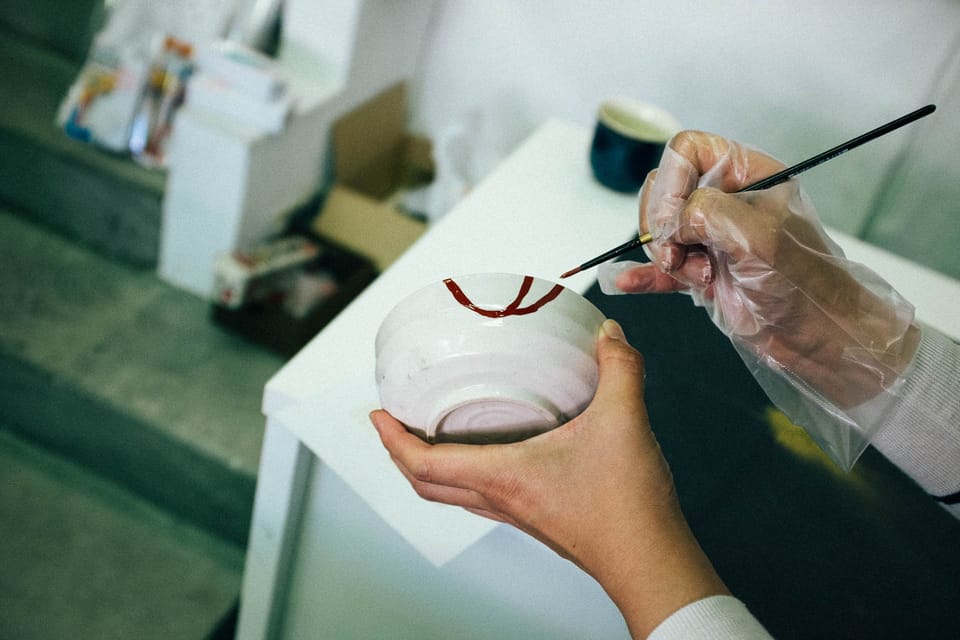
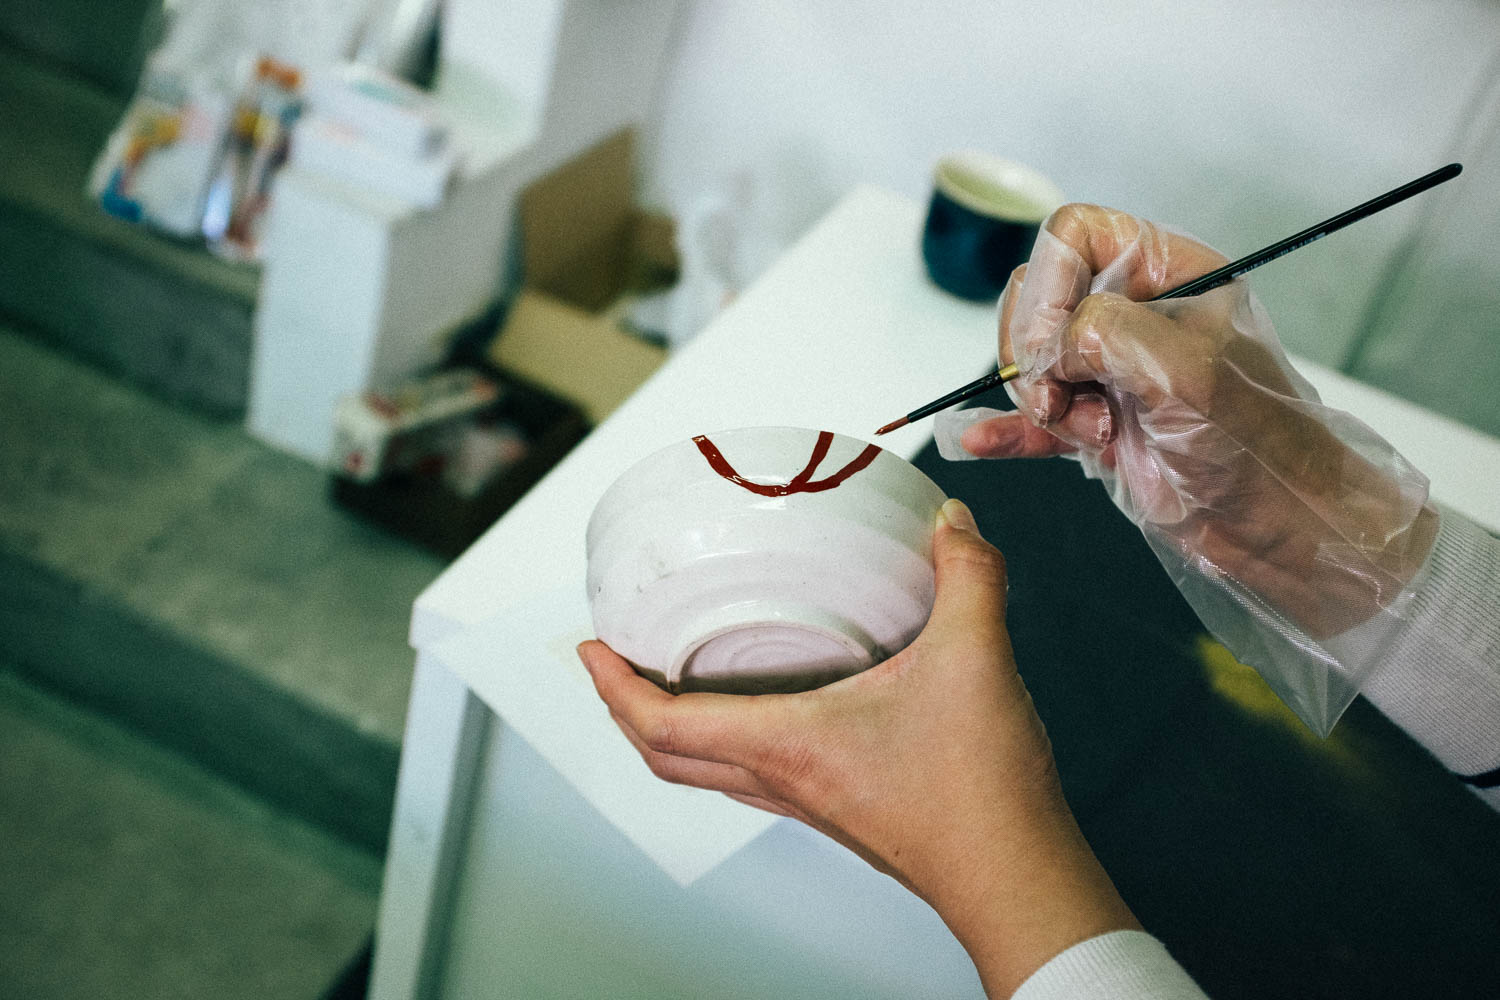
all the supplies we needed for the day were provided, as well as there being packs available for purchase so we could continue this craft at home. firstly, we learned how to glue our pieces back together using a two-part epoxy. there was also putty available, perfect for when there are pieces missing, or if you can’t be bothered trying to stick tiny pieces of ceramic back in.

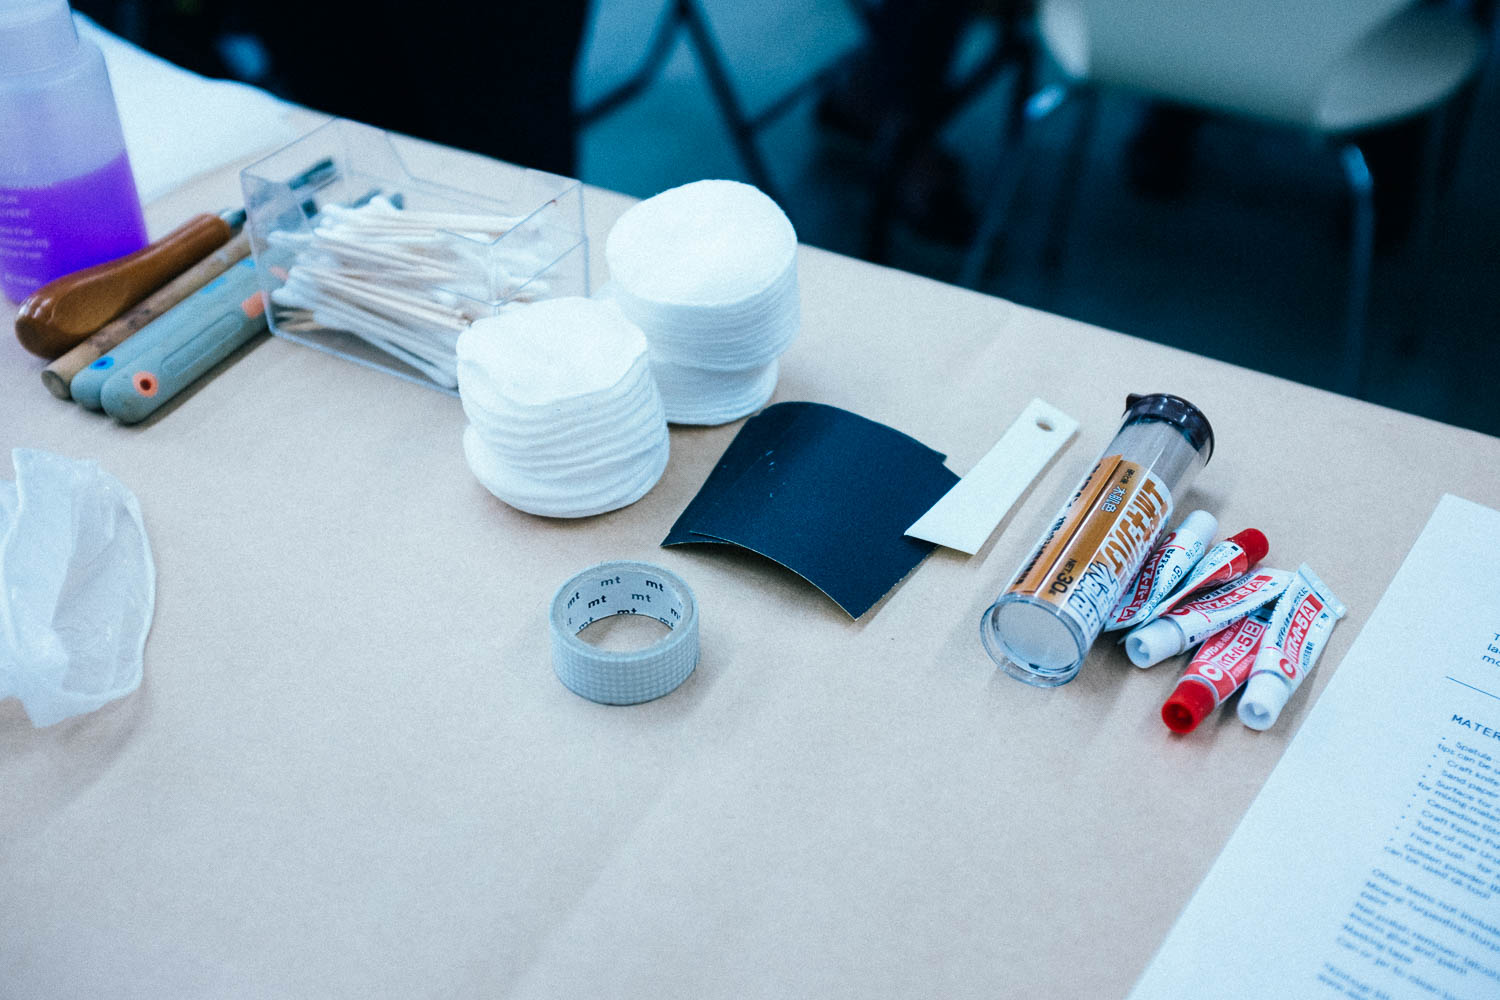
once the glue and putty were dry, we scraped off any excess, cleaning with turps and nail polish remover and using wet sandpaper for smoothing. i was also happy to discover that wet sandpaper also removed the ugly brown stain from my swan! i’ll remember that trick for next time…
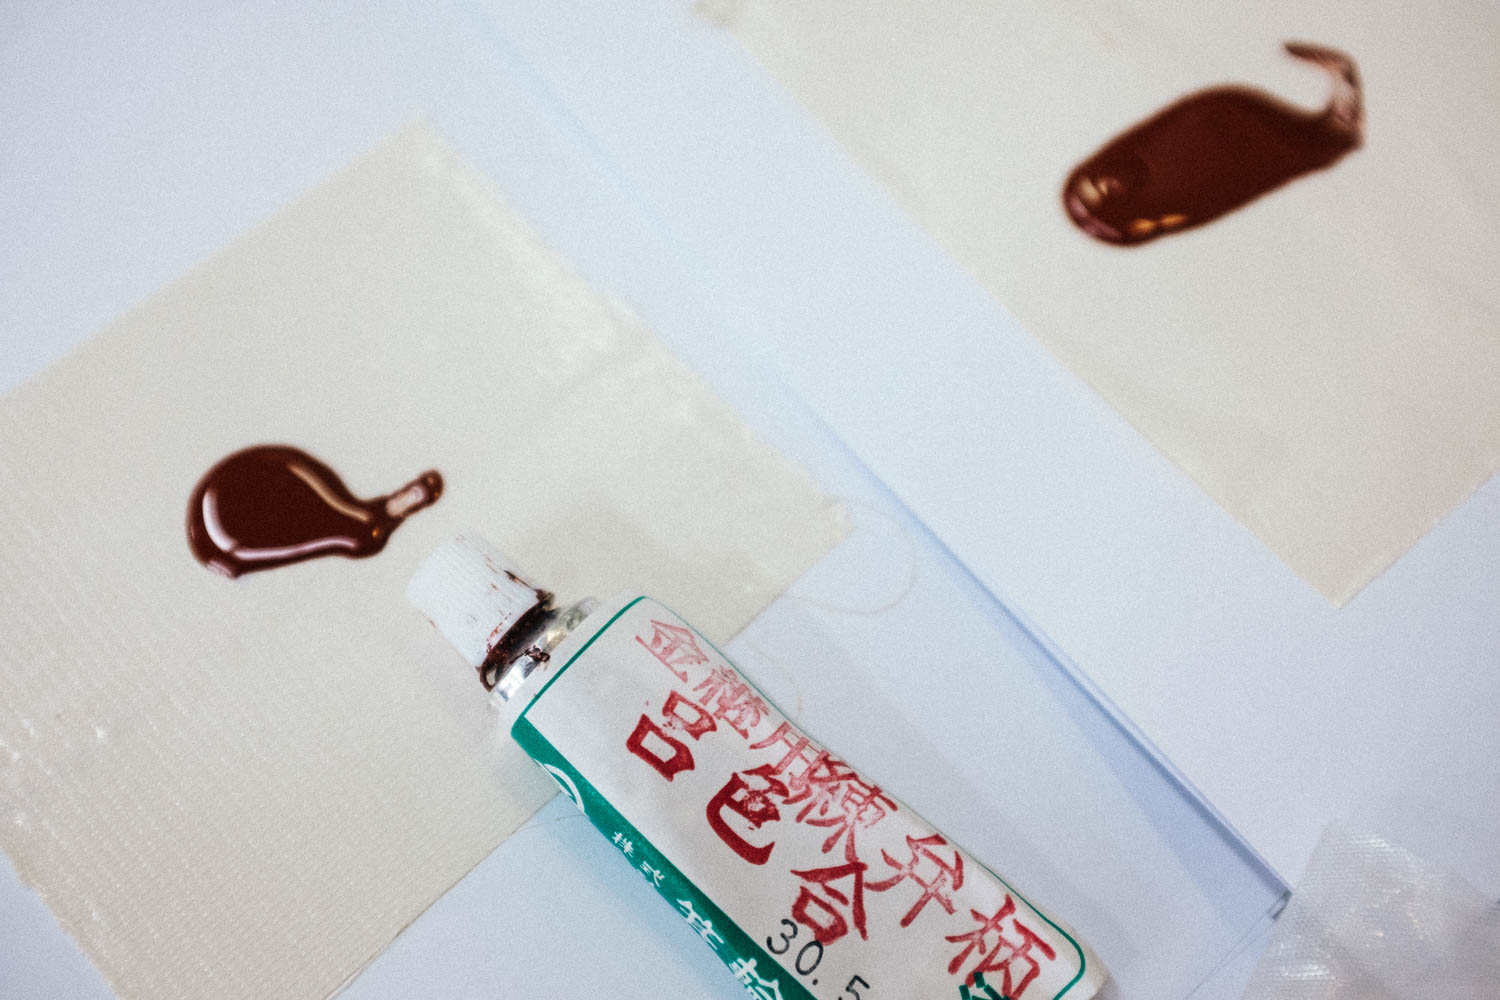
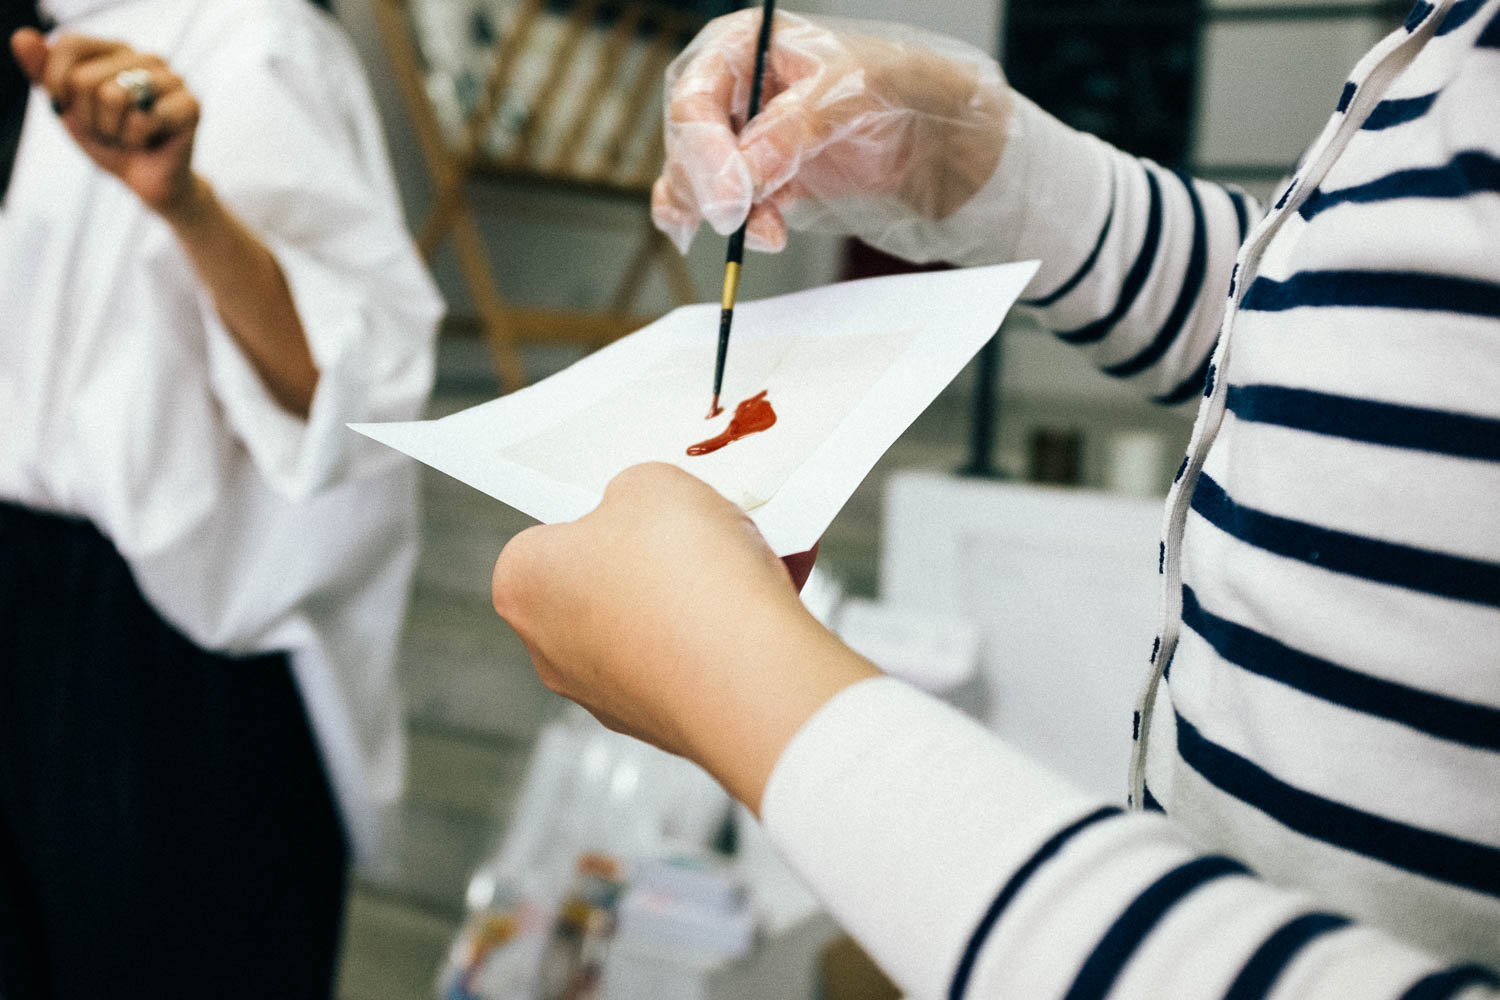
once everything was glued, puttied, smoothed and sanded, it was time for the lacquer. it requires a steady hand and a thin brush, but is surprisingly easy to use… you just have to be careful not to touch it as it takes two weeks to dry and smudges easily! this was the worst news for me… i have to wait two weeks to see the finished product?!? oh well, what’s that about good things taking time?

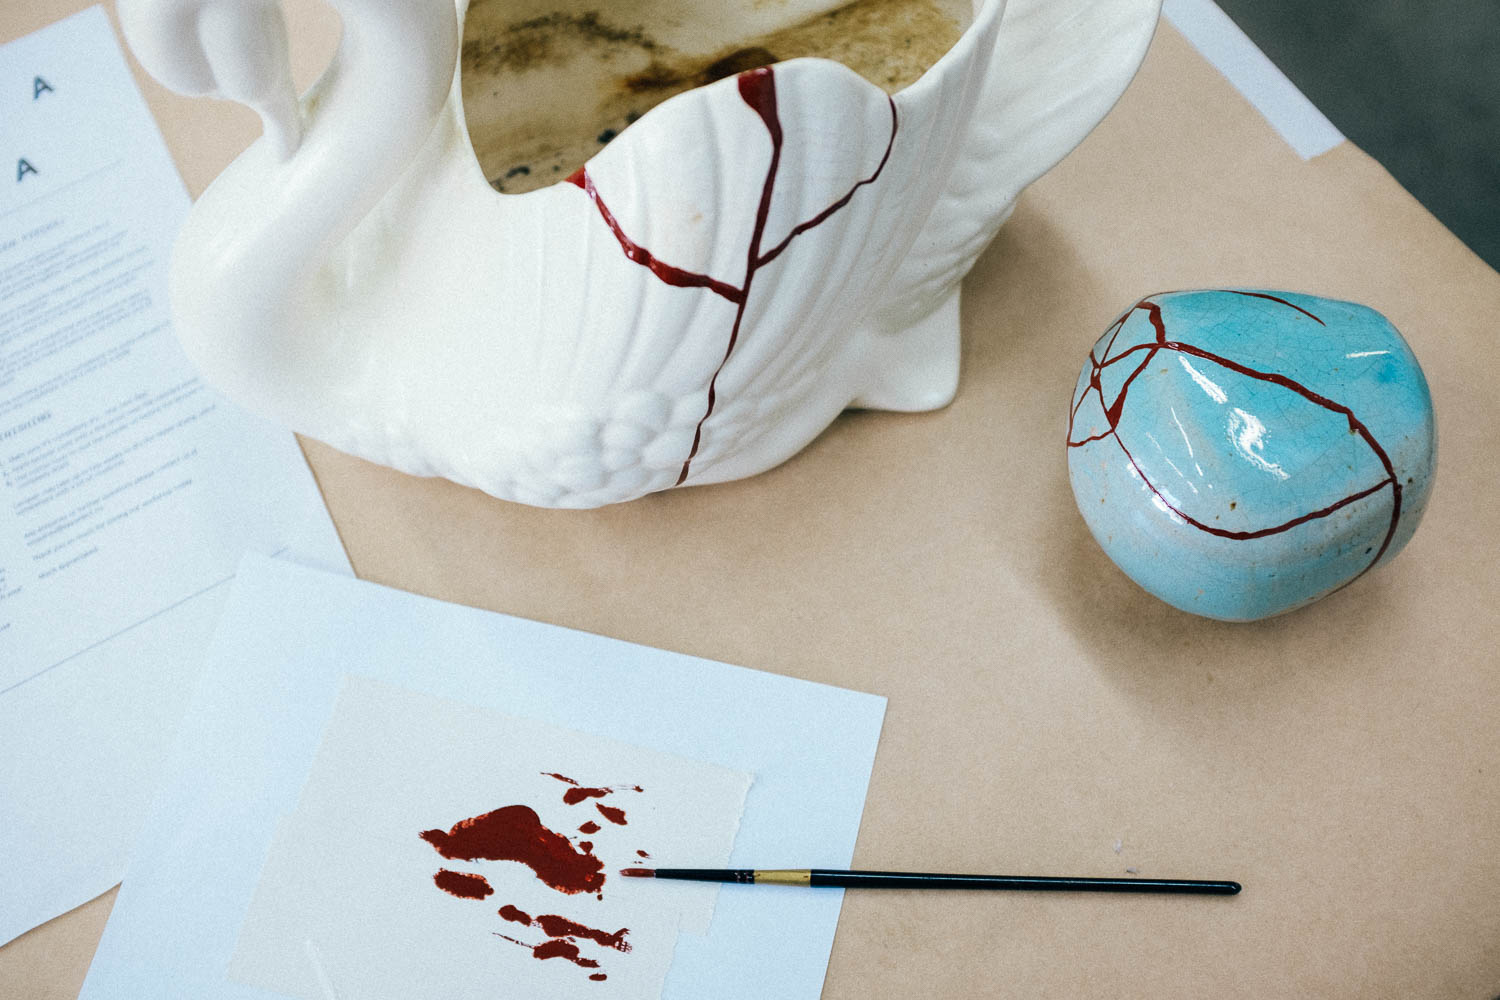
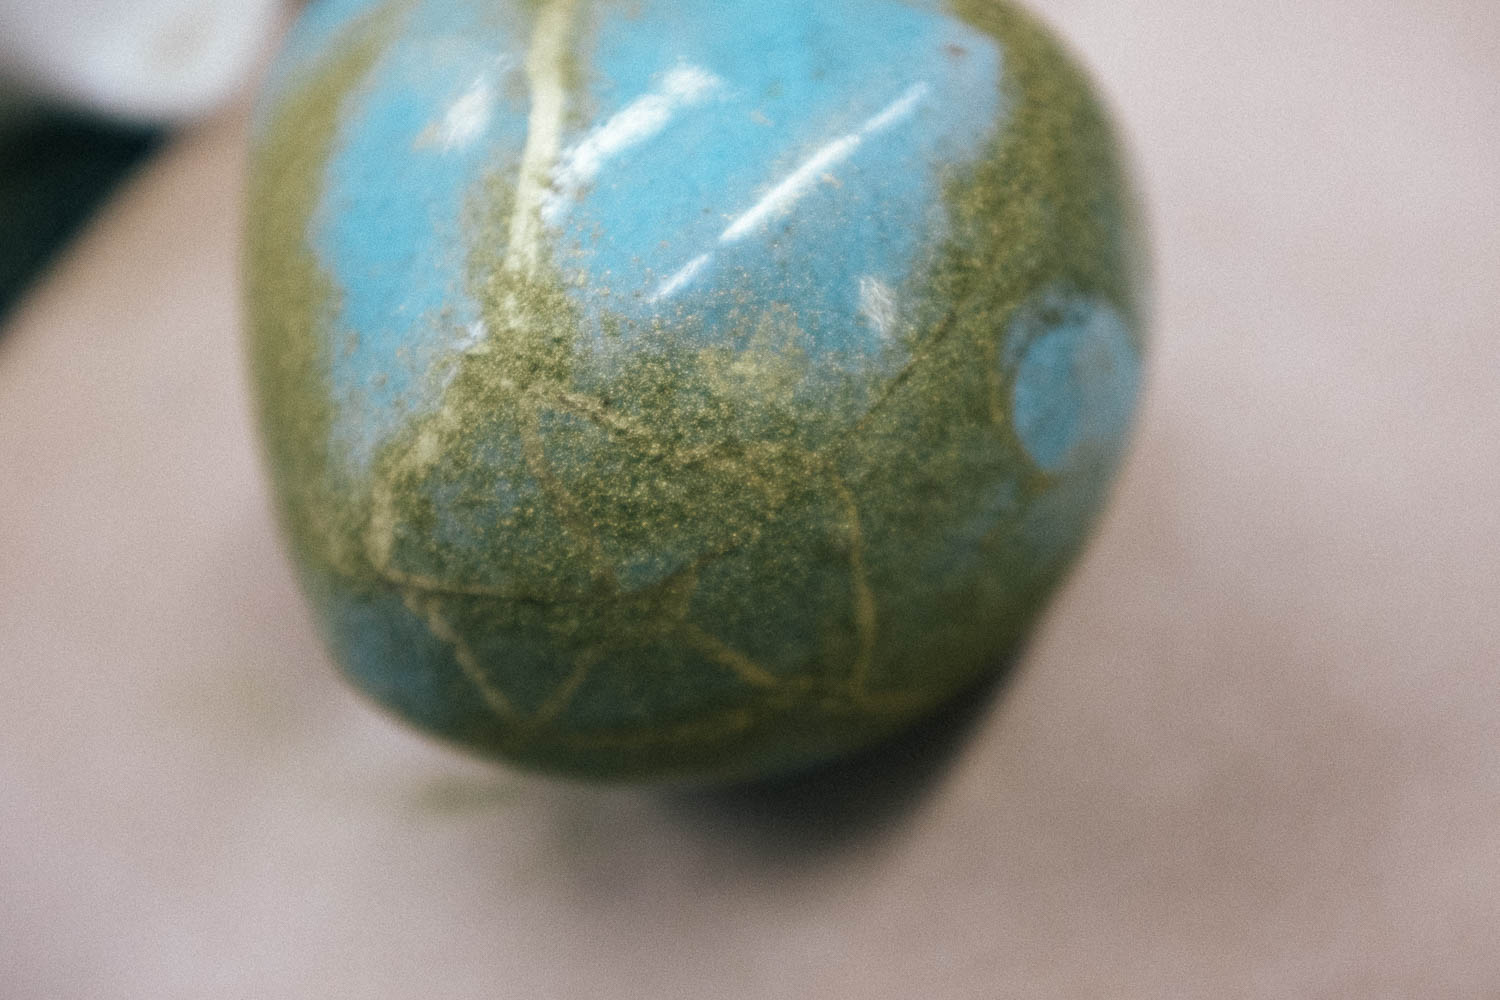
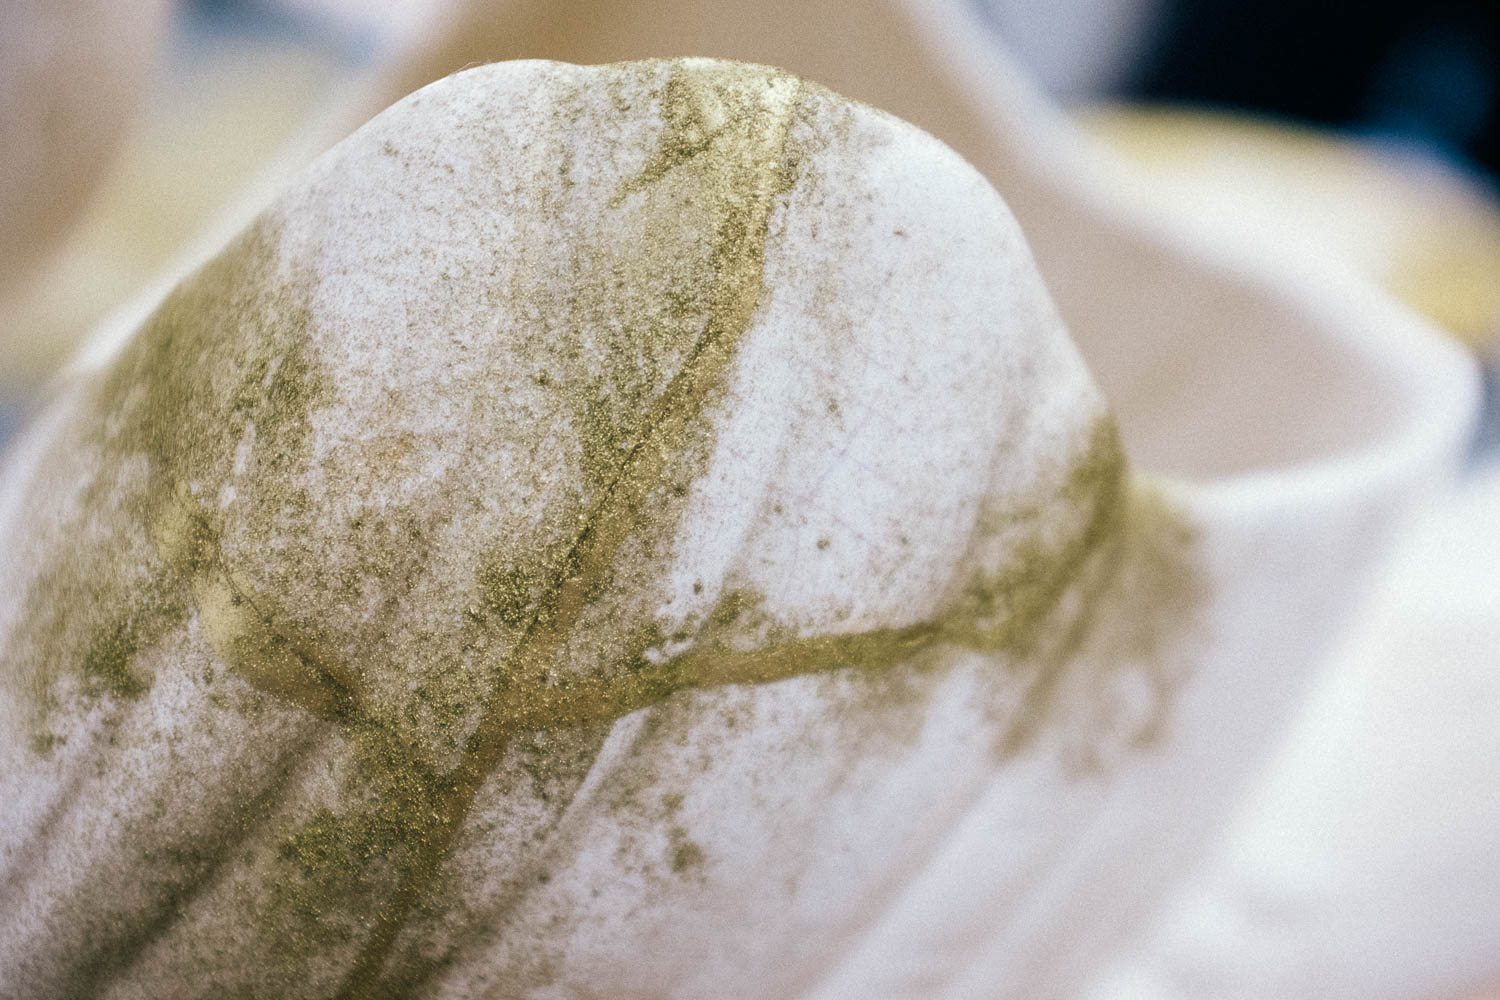
once the lacquer is on, it’s time for the dust. for this we used soft thick brushes, tapping the dust to cover the lacquer in generous amounts, again being careful not to smudge anything. it’s so exciting to see how things change during the workshop… going from something broken and scarred to being something repaired and even more beautiful than it was in it’s original state… bringing a new dimension to the story that it holds.
i’ve got my pieces carefully stored in the bathroom (weirdly the lacquer dries better in a humid environment) and i’m eagerly awaiting the day i can carefully brush off the excess dust and see these pieces in all their new kintsugi glory!


Member discussion